Greenhouse bubble wrap insulation: fitting and how much to buy
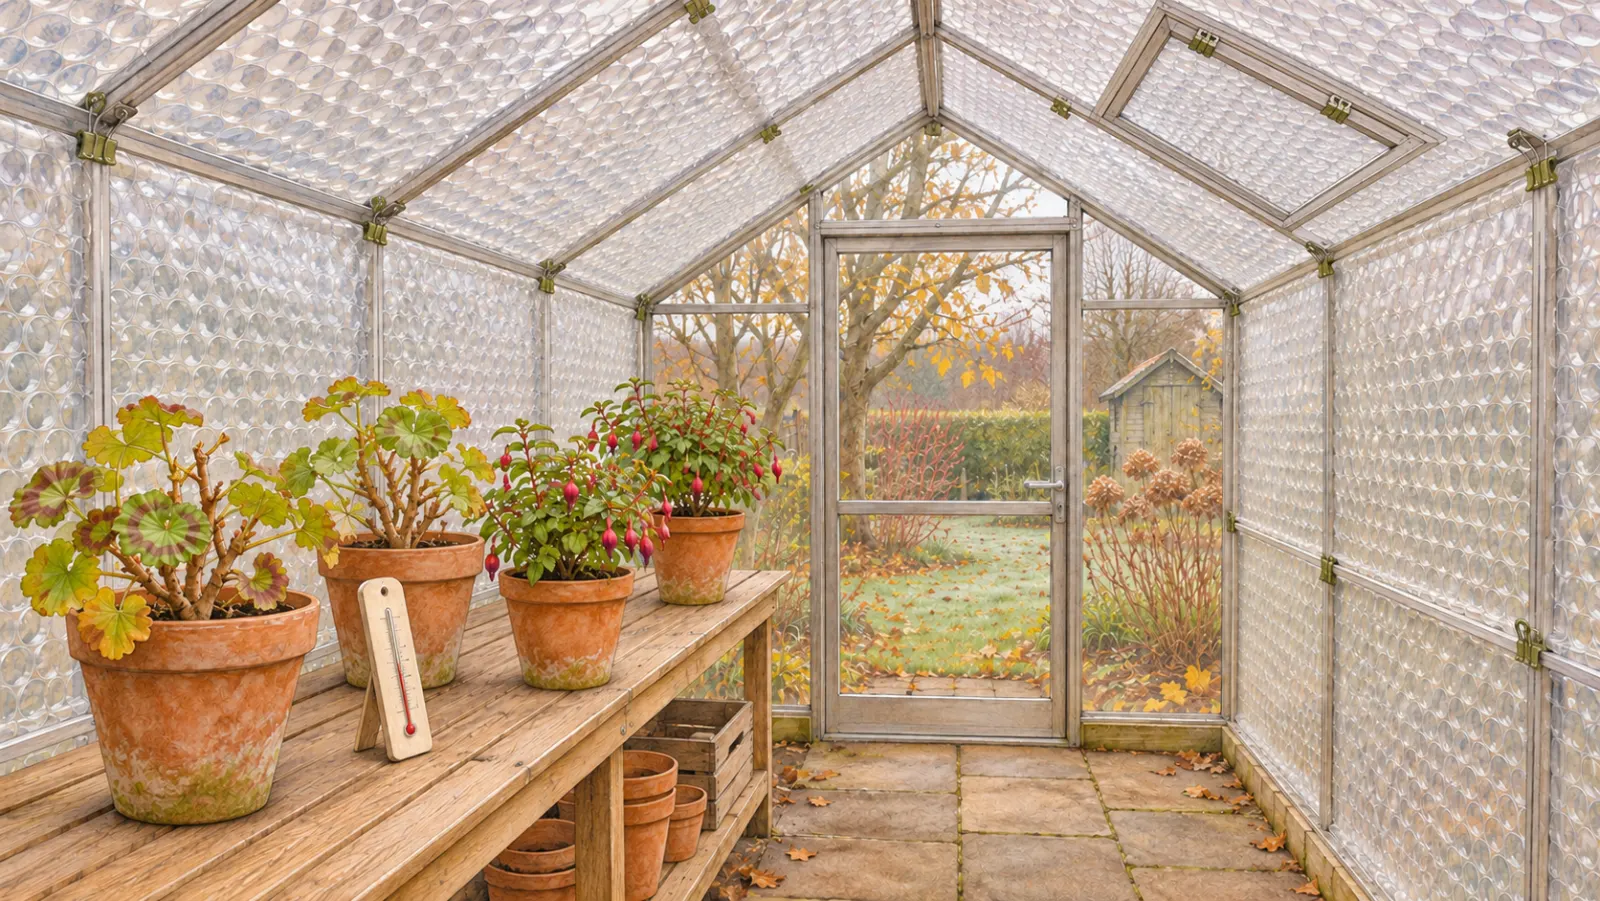
For a heated, single-glazed greenhouse, fit one removable layer of clear, UV-stabilized horticultural bubble film. Use frame-compatible clips, leave every vent working and measure the roof as well as the walls before ordering. If you’re growing hardy winter lettuce or alpines, keep most of the glazing clear: those plants usually need the winter light more than extra lining.
A few overwintering pots may need only a small lined compartment; tender plants filling every bench may justify lining the whole shell. Bubble wrap slows heat loss, so an unheated house can still freeze.
Should you line the whole greenhouse?
Line the whole house when you’re heating it for tender plants throughout; otherwise, start with the smallest area that needs protection. The light penalty is about 10% for an added plastic layer.
| What’s inside? | Coverage | Action |
|---|---|---|
| Hardy lettuce or alpines | Mostly clear glazing | Keep light; repair drafts |
| Tender fuchsias, heated house | Walls, ends and roof | Fit one clear layer |
| A few pelargonium pots | Small partitioned area | Line and heat that space |
| Mixed salads and tender pots | Tender-plant compartment | Leave salad glazing clear |
| Twin-wall polycarbonate house | Existing insulating air layer | Measure lows before adding film |
A partition needs a roof as well as sides if it’s to make a smaller heated enclosure. Leave room to open the entrance and reach the pots at the back for inspection.
For partial lining, the north-facing wall is a reasonable starting point. Keep it translucent: even the north wall admits useful diffuse light on cloudy winter days. Opaque foil across that wall throws this light away. Roof-only or north-wall lining saves material, but leaves the rest of the shell exposed; choose it for a partial retrofit rather than treating it as a small enclosed heated space.
Twin-wall polycarbonate already has an insulating air space, so start by sealing drafts and measuring overnight lows. Add a removable layer only where the crop needs more protection and can spare the light.
Use the forecast and your crop to time the job. Mild maritime gardens, from Ireland to the Pacific Northwest, may need only occasional frost protection. Cold continental gardens in Canada, the northern US and central Europe need a dependable heating or relocation plan for tender plants through prolonged freezes. In sunnier, mild southern gardens, daytime overheating can remain a problem while nights turn cold. Fit removable lining before you need it, on a calm day when the plants can safely be moved aside.
Which bubble film should you choose?
For a new purchase, our default is clear, UV-stabilized greenhouse film with bubbles around 1 in (25 mm) across and a reinforced or three-layer construction. For greenhouse UV film, expect at least three years of use; one reinforced product specifies three to four years indoors. Packaging wrap is a short-term reuse option, not our choice for a new seasonal lining. Reuse a sound sheet you already have before replacing it, but discard film that’s yellow, brittle or shedding fragments.
Bubble diameter alone doesn’t rank insulation. One supplier offers ⅜ in (10 mm) bubbles for insulation and 1 in (25 mm) bubbles for better light transfer. Compare the film’s construction, light transmission and intended use, rather than assuming the largest bubbles are always warmest. “Three-layer” describes the sheet construction; it doesn’t mean you must hang three sheets.
Budget by what you’re getting:
- Reuse is the budget option when the film is still clear and strong. Spend on compatible fixings and worn door seals first.
- Clear horticultural film with UV protection and removable clips is the sensible middle tier for seasonal lining.
- Reinforced film and a matched spacer-and-clip system cost more, but buy easier handling and a defined fitting arrangement.
Greenhouse film is sold in quite different widths. A 30 in × 98 ft roll (0.75 × 30 m), supplied with clips covers a different cutting layout from a roughly 5 ft (1.5 m) wide roll, even when their total areas are similar. Draw the panel pieces before choosing between them.
Choose the fixing system before ordering the film. Aluminum glazing bars usually take lining clips or twist-in hooks; wooden frames can take pins or staples. A plastic-framed house needs its own compatible attachment, so don’t copy a screw fixing intended for metal. Where the frame accepts them, purpose-made spacers can hold the lining 1 in (25 mm) from the glass.
For exposed-bubble film, put the bubbles toward the glazing and the smooth face toward you, as in this reinforced-film fitting specification. Some products allow either face toward the glazing. With those, use the product’s stated arrangement to orient the sheet.
How much bubble wrap do you need?
Measure the inside surfaces you’ll cover, not the floor footprint. Record each wall’s width and height, both roof slopes from eaves to ridge, and the triangles above the end walls. Mark the frame attachment points on a cutting sketch and add the overlap to each piece before cutting. Include doors and vents in the total: they’ll need their own moving pieces rather than holes left unlined.
For each rectangle, multiply width by height. For each end triangle, multiply its base by its rise above the eaves, then divide by two. Add the surfaces, allow for overlapping edges, and lay out the cuts on the roll width. Large leftover strips don’t necessarily fit the one roof bay you still need.
A worked example for a 6 × 8 ft (1.8 × 2.4 m) house
Say your measurements are 6 ft (1.83 m) wide and 8 ft (2.44 m) long, with 5 ft (1.52 m) eaves and a 7 ft (2.13 m) ridge. Each roof slope is about 3.6 ft (1.10 m) long. The four rectangular walls total 140 sq ft (13.0 m²), the two end triangles add 12 sq ft (1.1 m²), and the roof adds about 58 sq ft (5.4 m²).
That’s roughly 210 sq ft (19.5 m²) of lining. An illustrative 15% area allowance brings that to about 241 sq ft (22.4 m²); the actual waste depends on your cuts. A 4.9 ft × 49 ft roll (1.5 × 15 m) has 242 sq ft (22.5 m²): barely more than that area allowance. Area divided by roll width gives roughly 49 ft (14.9 m) of roll before checking how the pieces fit. We’d choose a 4.9 ft × 66 ft roll (1.5 × 20 m), giving 323 sq ft (30 m²), after laying out the cuts. Here the 5 ft (1.52 m) wall is slightly taller than the roll is wide: use vertical drops or add a strip with an overlapping join. A single horizontal course won’t reach.
The spare material is useful for repairs and cuts that go wrong. It’s also why a roll advertised simply as “enough for a small greenhouse” deserves a tape-measure check. A 20 in × 49 ft roll (0.5 × 15 m), for instance, contains only 81 sq ft (7.5 m²). Wall height and roof pitch change the requirement even when two houses share the same footprint.
Fit the lining without jamming the vents
You’ll need a tape measure, scissors, a marker, the chosen clips or pins, and clear greenhouse repair tape for film-to-film joins. Cut on a bench away from the glass. Clear the floor and move plants out of your working area; never lean your weight against glazing or reach over the roof. Use secure steps and another person for work at height.
- Repair first. Replace damaged panes, renew flattened door seals and make vents close properly. Seal unwanted frame and base gaps with compatible weather stripping or flexible sealant. Leave designed drainage outlets and ventilation routes open.
- Wash and dry. Remove algae and old summer shading before hiding the glazing behind film. Warm water and a soft cloth are enough for ordinary cleaning. Let the surfaces dry so you aren’t fastening tape onto damp dirt.
- Cut and attach the sides. Leave material for the joins and fix it to the frame without stretching it. Use at least a 2 in (50 mm) overlap where sheets meet, then join the film with clear greenhouse tape. Insert twist-in clips between bubbles and into their frame track; let the clips carry the sheet’s weight.
- Cover the roof. Pre-cut the pieces, secure them at the ridge and work down the glazing bars toward the eaves. Keep them supported so they don’t sag onto plants. The sides-then-roof sequence makes a manageable starting point; a particular frame system may be easier roof-first.
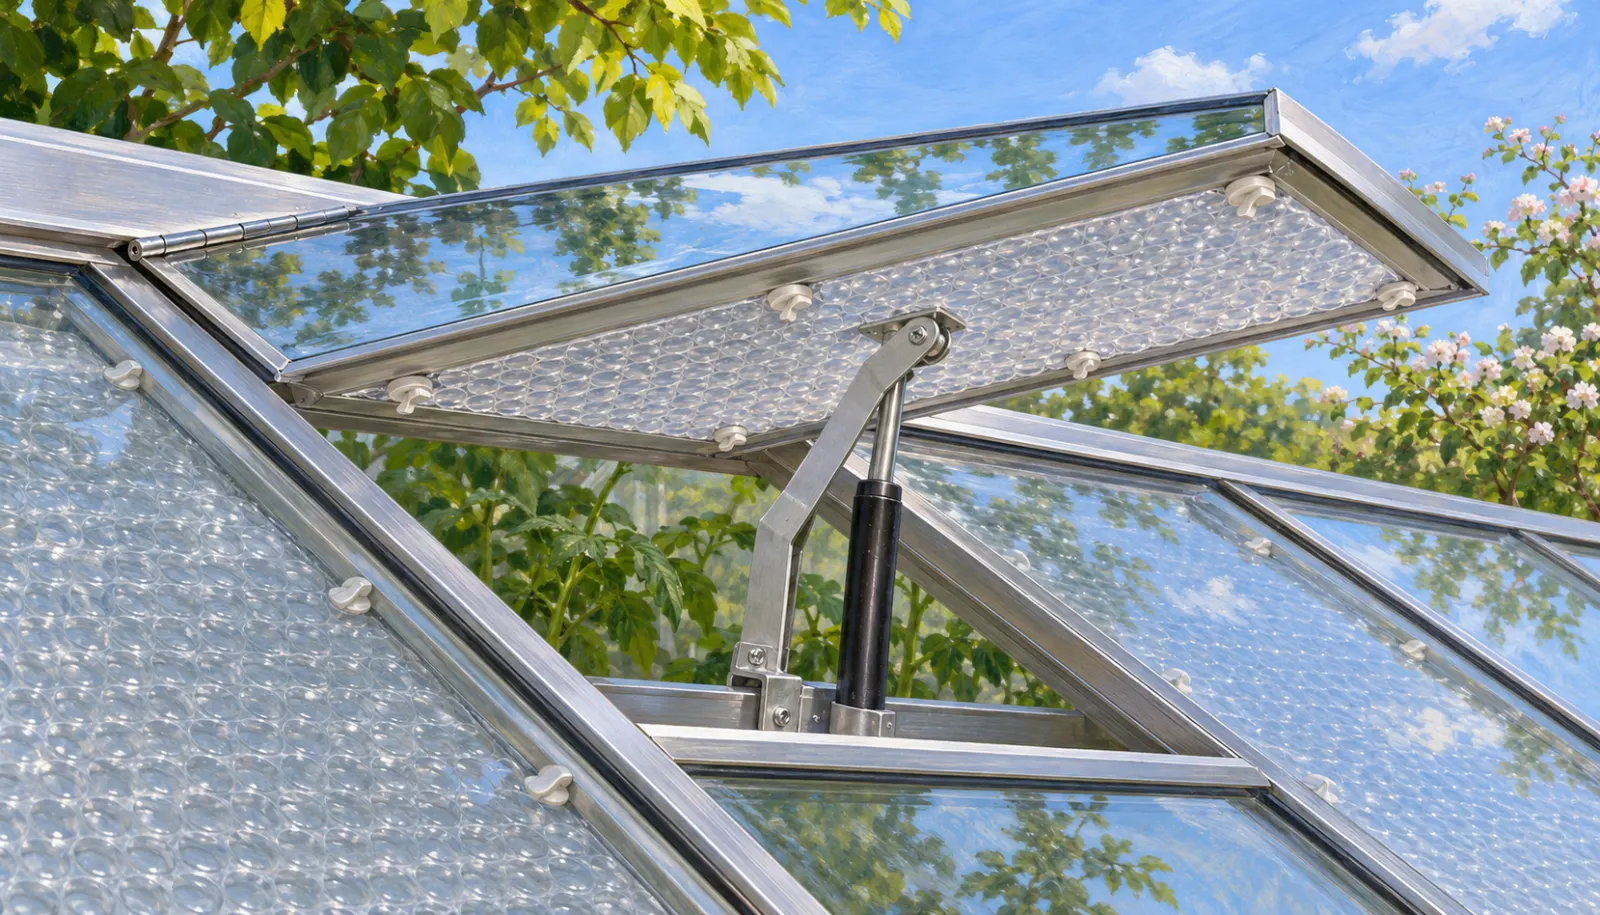
- Free each moving opening. Attach a separate piece to each roof-vent frame, cut it free from the fixed lining and open it fully. Keep louvers and automatic opener arms clear. Line the door separately and slide or swing it through its full travel. An internal door curtain can reduce drafts, provided it lifts easily and stays out of the track.
Clip spacing belongs to the fixing system. One supplier specifies clips every 2–4 ft (0.6–1.2 m) for its insulation; lighter sheets and other bars may need closer support. Buy the specified quantity for your layout, including roof and vent edges. A sheet that pulls away needs better support, not another layer of adhesive over the pane.
On twin-wall polycarbonate, attach the lining to compatible frame fittings and keep the panel’s drainage arrangement intact. Don’t drill the glazing to solve a lining problem. For a hoop house or polytunnel, use the maker’s internal film supports or clips; puncturing the outer weather cover creates another job for spring.
How much warmer will the greenhouse be?
There isn’t a dependable number of extra degrees for every bubble-lined greenhouse. The air pockets slow heat transfer, while sealed drafts reduce escaping warm air. A heated house keeps receiving replacement heat; an unheated one spends the warmth stored during the day.
You’ll meet claims of a 4–7°F (2–4°C) temperature gain and 25–35% lower heating costs, while a supplier advertises heating-bill reductions of up to half. The first figures are unverified guide claims; the up-to-half figure is a supplier’s promotional maximum, dependent on glazing. Neither gives a frost-protection temperature. Glazing, drafts, winter weather and the temperature you maintain all change the result. Budget for zero guaranteed extra degrees when deciding whether a tender plant can stay outside.
For basic frost-free management, 39°F (4°C) is a useful reference; plants needing warmer conditions need a higher setting. Put a maximum/minimum thermometer among the plants, away from the heater and direct sun. Reset it each day and read the overnight low; adjust the thermostat if the measured plant temperature falls below your target. If you can’t maintain the needed minimum, move the plants to suitable bright shelter before the freeze.
Say tonight’s forecast is 28°F (−2°C) and your overwintering pots need the frost-free 39°F (4°C) minimum. That’s an 11°F (6°C) difference to maintain. Keep the lined compartment heated or move those pots to bright frost-free shelter before nightfall; adding a claimed temperature gain to the outdoor forecast is no basis for leaving them unheated.
| Option | Best use or limit | Action |
|---|---|---|
| One clear bubble layer | Heated tender-plant space | Use as default lining |
| Second permanent layer | Further light loss | Prefer controlled heat for deep freezes |
| Heavy frost cloth | About 4°F (2°C) frost margin | Cover overnight; remove by day |
| Twin-wall polycarbonate | Air space already present | Measure lows before adding film |
| Draft sealing | Doors, base and frame leaks | Repair; preserve working vents |
Heavy frost cloth adds about 4°F (2°C) of protection, which is a temporary margin around the plant, not an overnight greenhouse temperature setting. For fabric choice and supports, use our frost cloth (horticultural fleece in the UK) fitting guide.
When lining isn’t enough
For a prolonged freeze, choose controlled heat or relocation over piling on more permanent layers. Extra sheets also remove light and make inspection harder. Choose a greenhouse-rated thermostatic fan heater for a heated compartment: air movement helps reduce cold corners. A tube heater supplies background warmth, so judge it by the plant-height minimum rather than its compact size. Use a professionally installed electrical supply and greenhouse-rated equipment. Keep plastic outside the appliance’s specified clearances; a small partition doesn’t reduce them. Arrange somewhere to move tender pots if power fails.
Without electricity, daytime solar storage can soften temperature swings: water containers work best where sunlight reaches them. They can’t replace frost-free accommodation through a long cold spell. Removable rigid foam over glazing at night is another option, but you must take it off each morning. For a small batch of seedlings, a heated propagator supplies warmth locally; it won’t protect unrelated pots across the house.
Frost-free storage is too cold for some crops. Basil needs a warm, bright windowsill or warm greenhouse; move it to that shelter rather than treating it like dormant pelargonium pots.
Gas and paraffin heaters need ventilation because combustion releases moisture and harmful gases, including carbon monoxide. Sealing a fuel-fired house tightly to “save heat” creates a hazard. Use a greenhouse heating arrangement designed for the appliance, rather than improvising around a flame and plastic lining.
Keep the plants dry, then take the film down for spring
Air the house during suitable mild daylight, then close doors and vents as the air cools and you need to retain heat; keep any ventilation required by a fuel heater. Water individual pots at the roots in the morning, only when the potting mix needs it, and empty standing water. Raise floor-standing pots on pot feet or bricks to keep drainage clear. Group pots within the protected space, while leaving space between leaves and keeping them off the film. If foliage stays wet or roof drips land on pots, use our winter condensation routine to find the moisture source and choose when to ventilate.
Remove the lining as frost-protection demand eases and growing seedlings need more daylight. That can come much earlier in a mild coastal garden than inland. If nights still threaten the plants, keep their heat or removable overnight protection available while uncovering the glazing by day.
During winter, inspect attachments after strong wind and refasten any loose edges. At removal, clean and dry sound sheets, label the bays and roll the film around a cardboard tube without crushing it. Store it out of sunlight, with sharp clips separately bagged. Next season, test a spare edge for brittleness before hanging it overhead.
Before leaving a newly lined house, open the roof vent, operate the louvers and shut the door. Check every sheet stays clear of the moving parts. Check the first overnight minimum before adding any more tender pots.