How to Winterize Drip Irrigation Before the First Freeze
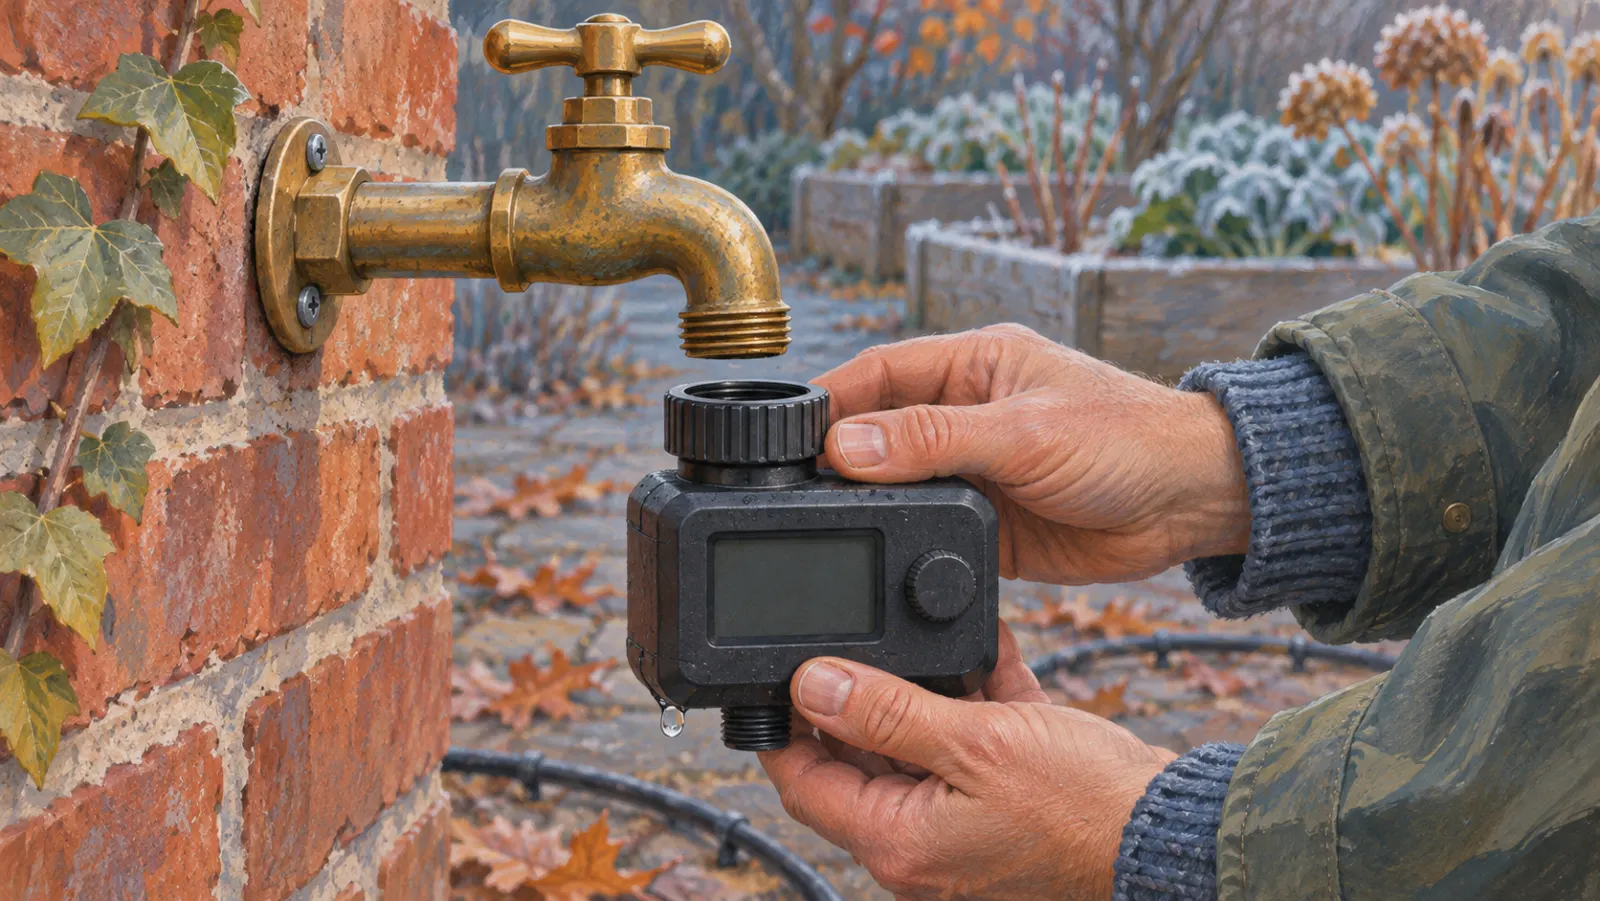
Before the first freeze, shut off the water, empty the timer and the fittings at the faucet, and bring them indoors. Open the ends of the drip lines. Pick up short runs to drain them; longer tubing can stay in the bed if you can lift every sag and let the water run downhill.
The same routine works for a kit that waters tomatoes in raised beds or pots in a greenhouse, as long as it connects to an outdoor faucet (tap). If your drip zones share buried plumbing with lawn sprinklers, find out how that system drains before you start opening fittings.
What comes in and what can stay out?
Choose a dry day with several daylight hours available, before the forecast reaches 32°F (0°C). Look first at the timer and filter bowl. Water expands as it freezes, and it has nowhere to go in a closed, rigid chamber. Treat a freezing forecast as the shutdown trigger; don’t wait to see ice in the tubing.
| What you have | Fall job | Winter home |
|---|---|---|
| Timer, filter, regulator | Disconnect and empty | Store frost-free |
| Removable backflow fitting | Drain separately | Store with the timer |
| Short soaker hose or tape | Lift and drain | Coil under cover |
| Accessible drip tubing | Open outlets; lift dips | Leave drained in bed |
| Buried branch without reachable drain | Book installer’s drain-down | Leave isolated and drained |
In an inland garden where freezing nights come in a run, shut down after the last useful autumn watering. In coastal British Columbia, Ireland or Atlantic Europe, you may still be watering sheltered pots between isolated cold nights. Disconnect the kit before the cold spell anyway. Carry a watering can to the cold frame on mild mornings if the soil is dry, or use a detachable hose and drain it again after each use.
Flush, shut off and empty the hardware at the tap
Take a photo of the assembly before you undo it. A typical tap-fed assembly has a timer, a backflow device, a filter and a pressure regulator, sometimes combined into fewer parts. Get the flow arrows in the picture so you can see which way the regulator goes back on.
If there’s still time before the freeze, flush while the head is assembled. With the faucet closed, open the far ends of the lines, point them away from bare soil, then run clean water through the open ends at the kit’s ordinary water pressure. Do each branch in turn if one gets most of the flow. Once the water runs clear, close the faucet. If freeze is imminent, prioritize getting the water out and flush at restart.
Open the timer’s manual watering mode with the faucet off, if the model allows it, to let trapped pressure escape downstream. Once flow stops, disconnect the timer and the rest of the head. Tip out the water, empty the filter housing, rinse the screen and remove the batteries from the timer. Store the head and timer somewhere frost-free; an unheated shed can get cold enough to freeze. Include any removable fertilizer injector. Let the parts dry, keep washers with their fittings and put everything in a labeled box. Store the timer upright in a dry, frost-free room.
Disconnect every hose from a frost-resistant faucet so the faucet can drain as designed. Where a conventional faucet has a dedicated indoor shutoff with a bleeder, close the shutoff and drain the isolated branch through its intended outlets. A screw-on garden backflow fitting can come in with the kit; a fixed backflow assembly needs its own drain procedure. If you can’t identify the shutoff or the assembly, ask a plumber or irrigation technician to show you those points before the next cold snap.
For a multi-zone kit with a valve manifold, do this before detaching the head: shut off its supply, then cycle through every zone to release trapped pressure before setting the controller to off. Use the valve maker’s specified manual-open position for solenoid valves; the controller being off doesn’t open them. Drain each valve housing as well as the tubing.
Give every branch a way downhill
Keep the flushed ends and the disconnected inlet open. Open any inline shutoffs for drainage. Set each outlet low, with its mouth clear of mud. Walk the branches. The places to look are the foot of a raised-bed wall, a path crossing and the loops around pots. Any dip followed by a rise can hold water even with the far end open.
Lift each sag gently to let the trapped water move. Pull a staple if it holds the tube down. For a loose run, work along it, lifting successive sections toward the open outlet. Keep the end below the section you’re lifting. Don’t tug on a barbed tee to raise the whole run. A fresh trickle tells you the dip was still holding water.
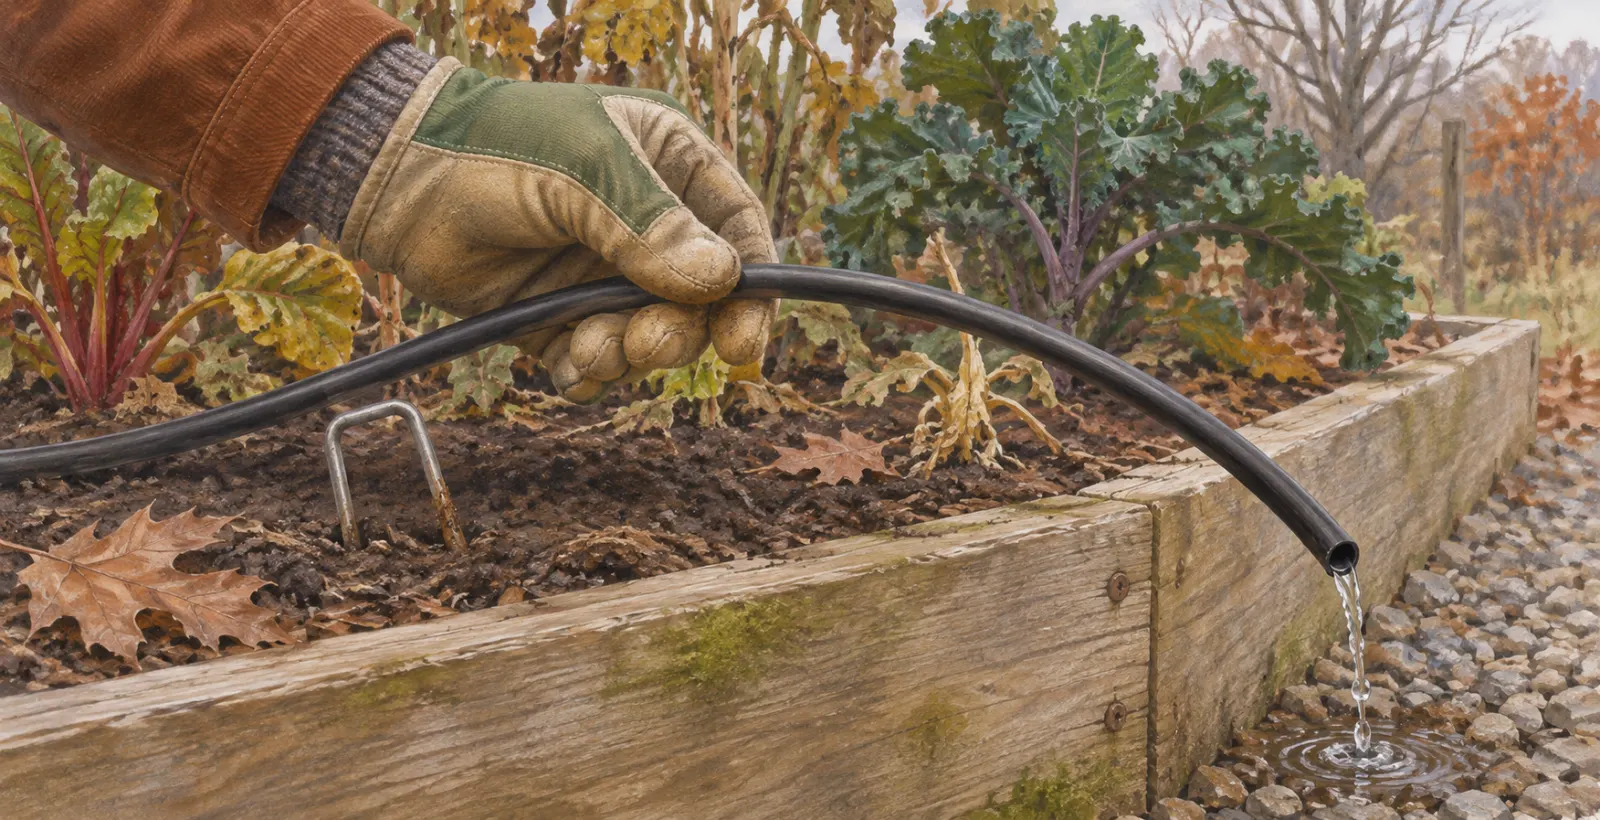
Say tomorrow’s low is 29°F (−2°C) and your timer feeds two raised beds. One line slopes straight down to the grass. The other dips at the path and climbs back to an outlet clipped to the bed rim. Unclip that outlet and lower it to the grass. Then lift the sag until you see water leave. Drain both branches that afternoon and bring the head inside before dark.
For drainage, budget several daylight hours and inspect the layout rather than stopping at a timer. A UK supplier allows up to an hour for a drip line. Iowa State says several hours may be needed. A short unobstructed run can empty quickly; a longer one with several dips needs a second walk. When the first flow stops, lift the low sections again and watch the outlets. If a pocket still releases water, keep lifting and draining; if you can’t reach or lower it, use the fixed-system route below. Once no more water leaves the accessible pockets, close the ends as the maker directs. Iowa suggests refitting caps loosely to keep out debris. Plug a detached inlet and secure it above the soil so insects and mud stay out.
Coil portable runs and leave sound tubing in place
Pick up a portable soaker hose. Its pores let water seep out, but lifting the hose clears dips you can’t see. Some sellers say seepage alone is enough; the safer default is to drain soaker hoses before winter, just as you drain drip tubing. Open the end, raise successive lengths so the water runs out, then coil it without tight bends. Do the same for short removable drip tape after taking out the staples. Empty tape and flexible hose can stay outside after draining, but if the run lifts out in one piece, put it under cover.
Leave firmly laid polyethylene tubing outdoors if you can drain it and its maker permits it. Bring in rigid connectors where they disconnect easily, especially at a low tee, rather than cutting sound tubing to get them out. Mark buried tubing and removed connection points with plant labels so you can find them without a spade. If a hose reel feeds the kit, drain its short leader as well as the hose. Follow the reel’s storage instructions for water in the hub.
For an intact tap-fed kit, start with the parts you have: shutdown doesn’t require a compressor or a new winterizing kit. Use the caps and fold-over ends already on the kit if they work. A matching flush valve is worth fitting where you undo the same stubborn cap every autumn. Bring the old fitting or the tubing’s printed specification when you buy one; the fitting must match the tubing and its connection style. For a buried run with no accessible outlet, put your money into a serviceable drain or have the installer show you the winter procedure.
When gravity won’t reach all the water
A line that dips under a path may need a drain at the crossing. Look for an existing drain there or a connection where you can separate the branch. Automatic drains belong at low points downstream of the control valves. A valve that drains one branch doesn’t drain a separate pocket behind another valve.
Use gravity for the accessible home kit. A buried line or fixed backflow assembly may call for a different procedure. Iowa State gives 20–30 psi (140–210 kPa) as a common air range where the maker specifies a compatible blowout. Above 30 psi (210 kPa), air is likely to damage emitters. That isn’t a safe ceiling for every kit: the water regulator’s rating doesn’t establish a permissible air pressure. A compatible blowout needs open discharge ends, eye and hand protection, and the lowest effective pressure specified for that system. Compressed air can eject fittings and injure you; if the maker’s instructions don’t cover your exact layout and parts, use an irrigation technician. For a pump-fed kit, include the pump and intake in shutdown: some pumps need dry storage and others need frost-free wet storage. Find the model’s winter-storage instructions before removing or draining it. If a separate zone must keep watering through winter, shut down the idle branches independently, and hand-water the overwintering pots in mild spells if you can’t keep their supply frost-free.
Run the spring test while you can watch it
Reconnect after the freezing nights have passed. Check each washer for splits and use the photo to put the clean filter, backflow device and regulator back in the right order. If you replace the backflow device, check with your water supplier which protection applies before reconnecting to drinking water. Use the pressure regulator specified for your lines.
Open the line ends and flush each branch for 1–2 minutes. If debris is still coming out, keep flushing until the water runs clear. Refit the caps and start one zone while you’re standing there. If a tee puddles or a tube shoots a jet, shut off the water and replace the damaged piece. For a local split in polyethylene supply tubing, cut out the damaged section, fit a matching joiner and test it again. If just one dripper stays dry, straighten any kink, clean a serviceable emitter or replace a clogged one. Walk the whole run: check every outlet, including the last dripper in each bed, and see it wet the soil. Set the timer only after that first manual run reaches every bed.