Where to Put a Thermometer in a Greenhouse
Put a greenhouse thermometer in the middle of the occupied growing area, at the height of the leaves. Keep the sensor out of direct sun and give air room to move around it. If you have one thermometer and a group of plants you’re trying to keep frost-free, put it right beside that group. A reading at the door won’t tell you how cold those pots got overnight.
Use a maximum-minimum thermometer if you only check the greenhouse once a day. Read both extremes in the morning: the low tells you about the night, and the high catches overheating you missed the previous afternoon. The same placement works in a glasshouse or a hoop house (polytunnel).
Where to put the first sensor and when to add another
| What you need to know | Where to measure |
|---|---|
| Typical temperature around the crop | Measure in free air by central leaves |
| Whether tender pots get too cold | Measure beside the most exposed tender pots |
| Whether frost cloth helps | Place matched probes inside and beside cover |
| Whether the heater reaches the crop | Measure beside the farthest vulnerable plants |
| What the house gains over outdoors | Match shielded indoor and outdoor probe heights |
“Leaf height” is the height of the part of the plant you’re protecting. Lettuce in the ground and a pelargonium on greenhouse benches (staging) may be in different layers of air. For leaves and shoots, put the sensing part among the air around the canopy. A probe pushed into compost answers a different question. Side and end walls are often colder at night than the center. Put a second sensor there if that’s where vulnerable plants stand.
Mount the sensor so it measures air
Choose a bed or a group of pots first. Fix the thermometer to a narrow stake or hang it from a support over the edge of the bed, where you won’t knock it with a watering can. Leave room around the sensing part. A wired probe gives you the option of clipping it at the leaves and putting the display somewhere convenient. Mark the spot on the stake so it’s easy to return to it after watering, harvesting or lifting the cover.
The middle of the canopy works when there’s an air gap. In a dense bed, move the probe just above the leaves. Raise the sensor as the canopy grows. In one high-tunnel study, shielded sensors at 6.3 in (16 cm) and 3.3 ft (1 m) above soil represented different crop heights. Those are examples, not standard mounting heights for every greenhouse. Avoid resting the unit on the bench, hanging it from the roof or pressing the probe against glass. Log the position again if you move it, so you can tell when the record started describing a new spot.
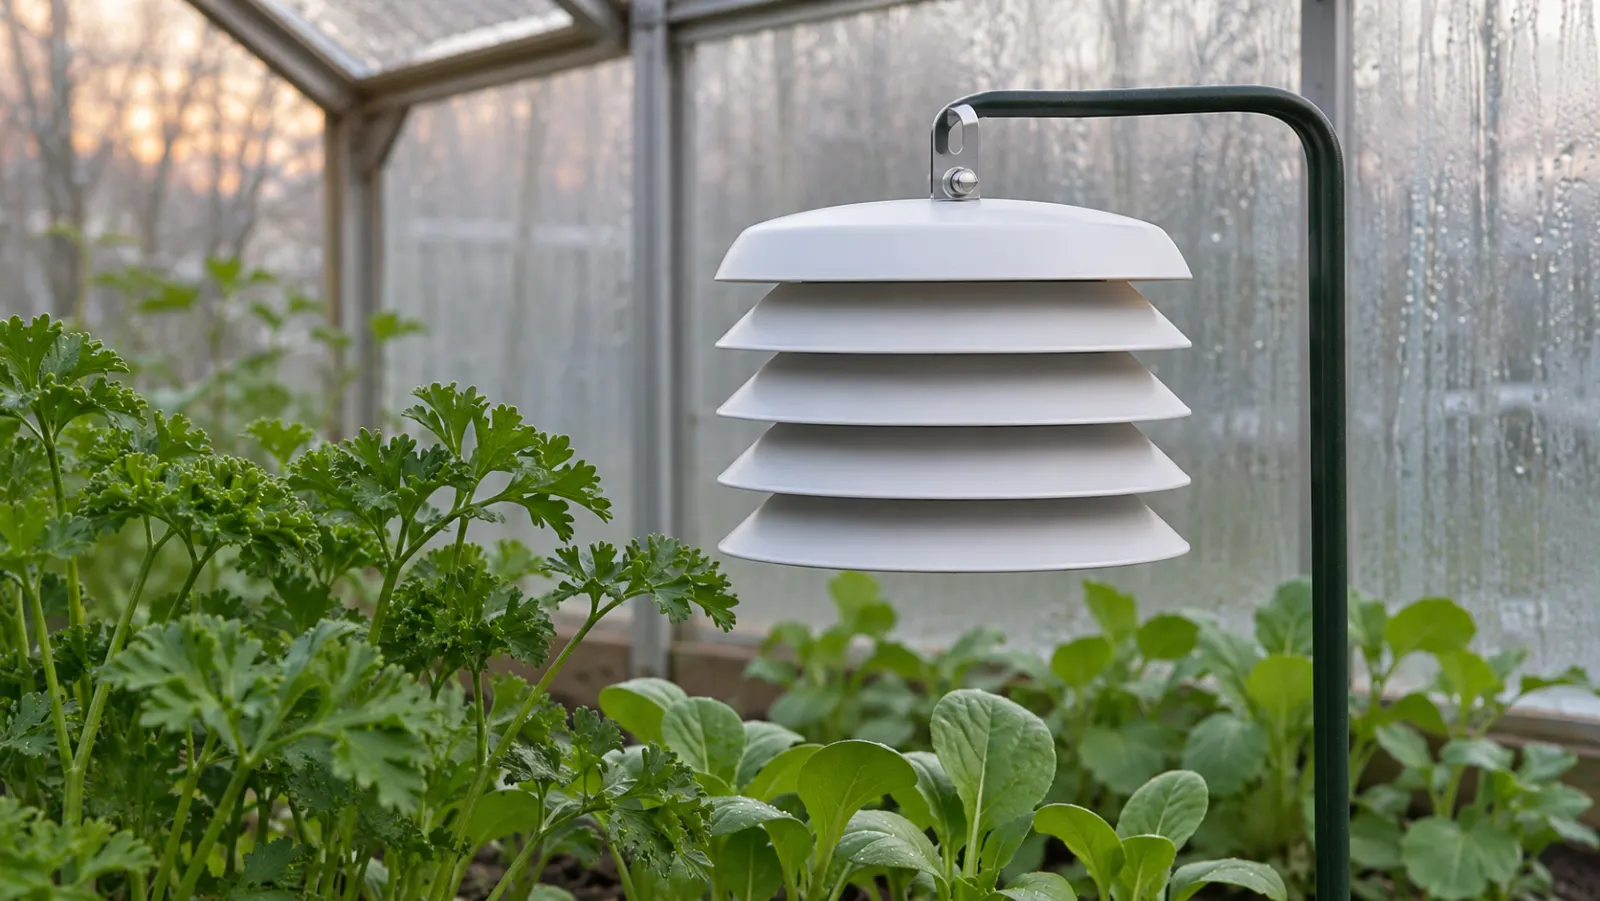
Look at the spot when the greenhouse gets its brightest sun in the current season. A beam can hit a sensor as it moves across the house, even if the probe was shaded when you installed it. Direct sunlight heats the sensing body above the air temperature. Use a vented white radiation shield where sun can reach the instrument. Its stacked plates shade the sensor while outside air can pass between them. Permanent shade with free airflow is fine for a simple setup, too. A sealed box keeps sun and air away together and can hold a pocket of warm air.
Choose a passive shield for ordinary home monitoring. If an important control reading is exposed to sun and still, warm air, a fan-aspirated shield draws air past the sensor and responds more quickly. Look for one that fits your probe with the sensing element inside the shaded air space, clear of the plates. If you build one, leave the spaces between plates open to the air.
For a heated house, keep the thermostat sensor away from the heater outlet and glazing, at plant height. To check the heater’s reach, add an independent thermometer next to the farthest vulnerable plants. If those leaves sit in cool air while the thermostat reads warm, check probe placement and air circulation before turning the thermostat up.
Which thermometer is worth buying?
Start with a digital min-max model if you visit the greenhouse most days. Choose one whose minimum resets on demand, or whose manual clearly describes the rolling window. A cabled model with manual-reset memory suits a low bed when you want the display up where you can read it. Read the instructions to see which sensor or channel owns each stored minimum. Before buying, check the rated operating range, the accuracy near freezing, and whether the probe and display can handle their different exposures. If only the probe is rated for damp conditions, put the base in a dry place within cable or radio range.
Spend more on a logger if you need to know when a cold dip occurred or how long it lasted. A min-max display could show the same low after a brief dip or most of a night near freezing. A logger takes readings at intervals and keeps the sequence. For broad day-and-night trends, start with a 15-minute recording interval. Choose one minute when investigating heater cycles or brief dips, if the logger supports it. The sensor’s response time also matters: frequent logging cannot make a slow sensor follow a rapid change. Shorter intervals fill memory faster, so check how much history the logger keeps and whether it overwrites older readings.
Choose remote alerts for a house you can’t visit before a cold night. Test them with the door shut and the phone where you expect to get the alert. Advertised open-air radio range can shrink sharply through walls and glazing. A Bluetooth unit can save readings while you’re away, but retrieving them later doesn’t warn you overnight. Some systems need a reachable gateway, Wi-Fi or cellular service for that. A cheap local min-max gives you something to check after a dropout or power failure.
Read the accuracy in the manual before comparing decimal places on a display. If two instruments are rated ±1.8°F (±1°C) each, opposite errors can produce a gap of 3.6°F (2°C) in the same air. A screen that shows tenths can still have that much tolerance. If you want to work close to a frost threshold, pick a device with a tighter stated tolerance in that temperature range.
Run a paired overnight check
- First set both sensors side by side at the same height and in the same shade or matching shields. Give them time to settle after moving them. For a careful comparison, leave them together through a day and a night. A 24-hour side-by-side check lets you compare both cool and warm readings before separating the sensors.
- Put one in the usual growing zone and the other beside the pots or plants you’re worried about. To compare two places, keep the sensors at the same height above their respective floor or bed when practical. When plant heights differ on purpose, record the heights so you know what the comparison includes.
- For the normal daily routine, read and record both highs and lows at the same time each morning, then reset both instruments. For a separate overnight-only test, record the daytime highs before resetting both near sunset; read the minima the next morning. Label the window. If the units use rolling memory, compare matching periods or use time-stamped data.
- Swap the sensors on a later night with similar conditions, keeping the same mounting spots. If the low follows the spot, you probably have a cold pocket. If it follows the instrument, check the two units side by side again before trusting either gap.
Say the middle bed records 37°F (3°C) overnight and the tender pots by the outer bench record 31°F (−0.6°C), a difference between minima of 6°F (3.3°C). Those minima may have occurred at different times; use time-stamped readings to compare the two spots at the same moment. After a swap, the outer pots still get the lower reading on a similar night. Move those pots to a spot already shown to stay frost-free before the next comparable freeze. A move to the central bench is useful only if the crop tolerates the temperatures you measured there. Plants needing a warmer winter home belong in shelter suited to the species.
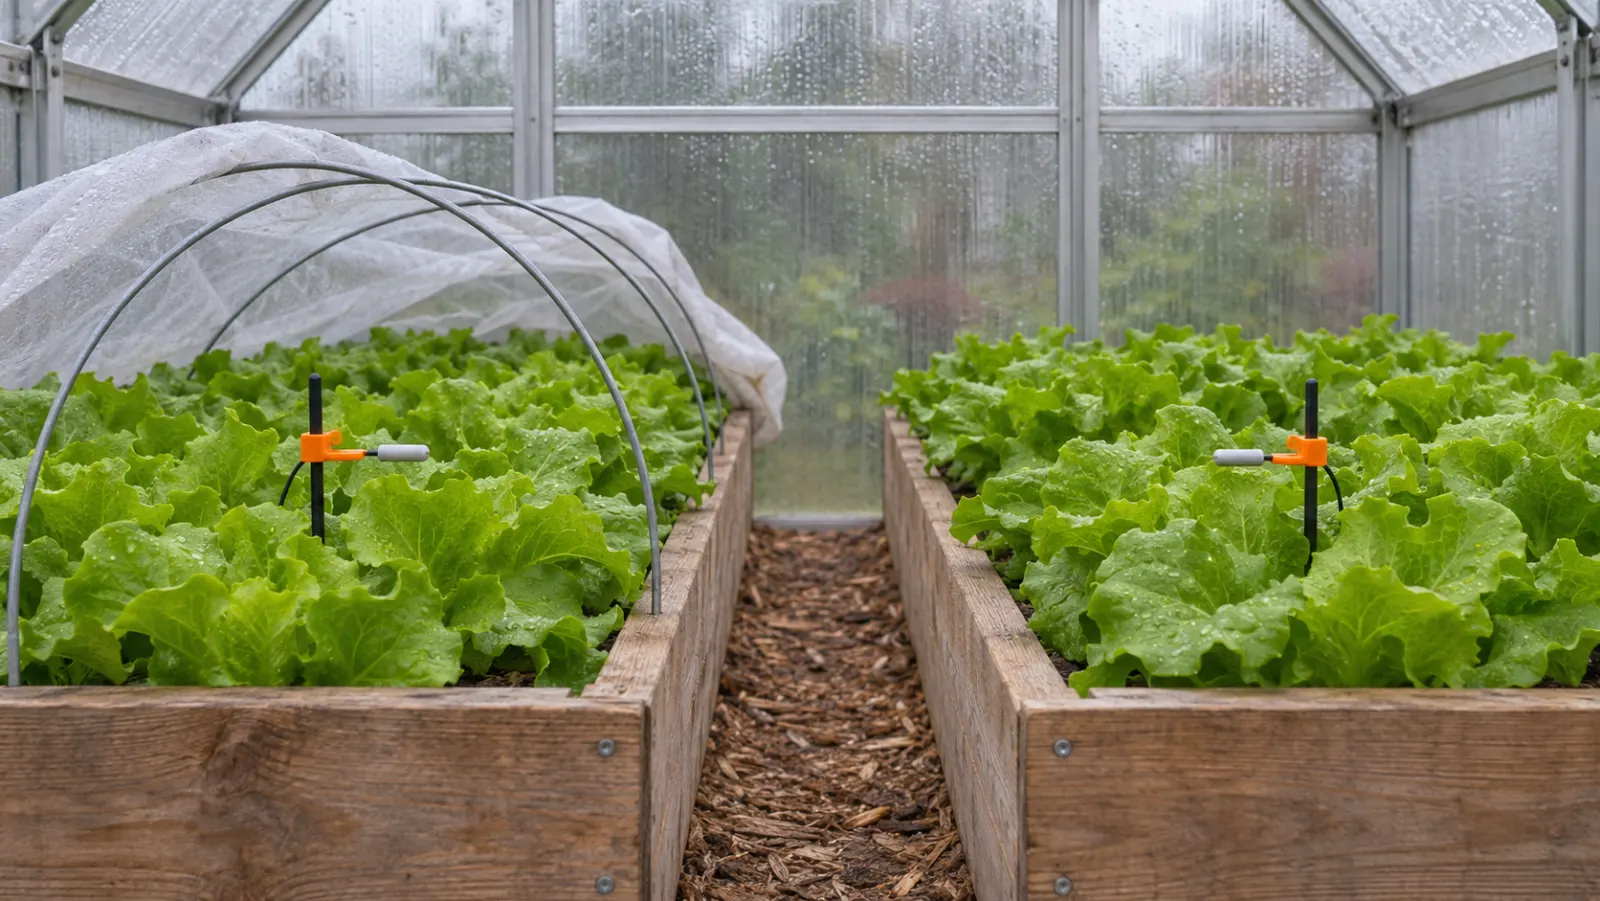
To find out what frost cloth (horticultural fleece in the UK) buys you, put one probe in the air under the cover at leaf height and the other beside a nearby uncovered crop at the same height. Close the cover as you normally would and keep the sensing tip clear of the fabric and soil. Comparing with a probe above the hoop can be useful, but that also compares different heights. Leave the outside probe in comparable exposure within the house. A draft from the door would make your cover look more effective than it was.
If you want to know what the greenhouse gained over the garden, repeat with one shielded sensor outdoors at the same height as the crop sensor. That gives you a comparison for those two locations. For routine outdoor weather readings Purdue instead suggests 4–6 ft (1.2–1.8 m) above the ground. Don’t subtract an outdoor weather-app low from an indoor crop reading and use the difference as a fixed allowance. Western Nevada high tunnels warmed strongly by day and still fell close to outside lows. On a mild maritime winter day you may spend more time watching for damp air and sudden sunshine. In a colder inland spell, give priority to the overnight lows and the duration of freezing.
Review the record weekly and after a change in weather, plant height or protection. A rough daily temperature midpoint is (high + low) ÷ 2; a logger gives a better account of time spent hot or cold when the day’s swing is uneven.
Turn the reading into an early warning
For plants you’re keeping just frost-free, our starting recommendation is an air-temperature alert at 37°F (3°C), with the probe beside the vulnerable plants. With a stated instrument tolerance of ±1.8°F (±1°C), the air could already be about 35°F (2°C) when that alert arrives. Act then: move the plants or put their planned protection in place. Raise the alert if you need more travel time or the temperature is dropping quickly. Plants that need a warmer winter home need a higher threshold; a frost-only alert comes too late for them.
Leaf temperature differs from air temperature because leaves exchange heat and lose water. The alert is a prompt to act, not a safe minimum for every leaf. Test notification delivery as well as the sensor; a logger that stores a dip may still report it after you needed to act.
The same crop-height placement works for spring seedlings and summer crops. Check the maximum as well as the overnight low. For a mixed greenhouse, start increasing ventilation before the crop-level air reaches 81°F (27°C), above which prolonged heat can damage plants; aim around 77–81°F (25–27°C) using ventilation and, when needed, shading. Cool-growing plants need earlier action. Keep the sensor shielded as the sun’s path changes, rather than moving it into a cool corner to get a more comforting number.
When a reading looks wrong
If the spike happens when sun reaches the sensor, fix the shield and retake the reading. If only one unit drifts when the two sit together, check the battery, the probe connection and the manufacturer’s accuracy range. For a dry air sensor, compare it beside a calibrated reference thermometer in the same shaded air and let both settle. Two unknown instruments can agree and both be wrong.
For an immersion-rated probe, an ice-water check gives a reference near 32°F (0°C). Pack an insulated cup with small pieces of ice made from distilled or purified water, then add the same water so ice and water fill it from top to bottom. Immerse the sensing section to its specified depth without touching the sides or bottom; use a container deep enough to do that. Wait for the reading to stabilize. Keep a dry-only sensor, cable joint or display out of the water. A discrepancy beyond the stated tolerance calls for a calibrated comparison or replacement before relying on it near freezing.
If the air reading looks sensible but you want to know whether the bed is ready for seed, use a soil probe at the seed or root depth relevant to the decision. For a typical root-zone reading, place it 2–4 in (5–10 cm) deep, away from a dripper. Keep it away from side and end walls for a representative bed reading. Flag the probe and protect its cable from cultivation before you dig. An infrared thermometer gives a surface reading and can help compare leaves or benches. It won’t record the surrounding air overnight.
If you’re looking at wet leaves rather than frost, a humidity reading—or visible condensation if you have no humidity meter—can help you decide when to vent. Write the location, height, low and action beside the date. That little note will tell you more next winter than an unexplained number left in the thermometer’s memory.